Things to Think When Considering New Houseplants:
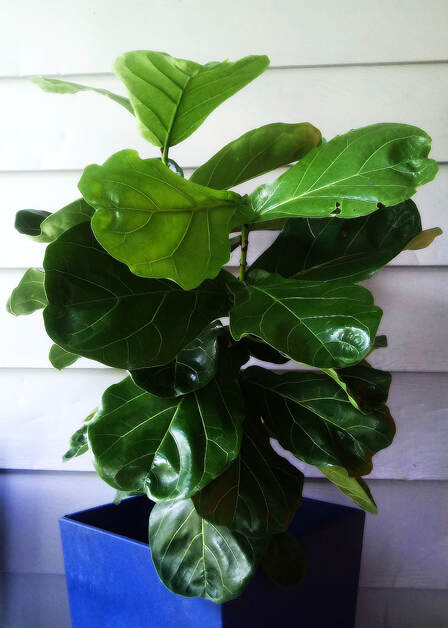
Featured: Photo Credit: Annescapes, Designed By Anne Handcrafted Plant/Tree: Fiddle Leaf Fig Zone: 7B Indoors: Fall - Winter Outdoor: Late Spring/Summer
0 Comments
 In every profession, there has to be a Mentor, a Leader; an Expert in their trade. Meet the one who not only coaches me in the Arts and Business, he is also extremely Smart, Talented, Intellectual Educated Entrepreneur, Visual Artist, Writer, Producer, Vegan and Poet. A Natural Born Artist! Artistry of John Chillum. From my brand (C'ANNEDLES) to the first logo for my products. When it's time to share our story with the community, he has supported Designed By Anne, LLC and Designed By Anne Handcrafted from the beginning. He understands the importance of a vision, goal and dream and has been instrumental and influential. His incredible insight and impeccable Artistry is legendary all by itself. It's your #Team that helps you build from the ground up. Today, we, I give thanks to the Creator and John for his humble, resilient spirit and gifts of John Chillum. My Son. Thank you. His story is even Greater!  It's been one year since we were invited to the Historic Hippodrome Theatre to showcase our Arts & Crafts.
We are appreciative of the opportunity to exhibit again this year. It's just not your ordinary venue. Here, you will experience great local Artists who not only are naturally gifted Creatives but also decided that Entrepreneurship is their niche. Join us at our 2nd Annual Raw Richmond Presents, "Stellar" event on November 21, 2019 at 7:00 p.m. 526 N. 2nd Street, Richmond, VA 23219 for an unforgettable, exclusive and explosive Art experience. Your gift of $22.50 per ticket to guarantee your entry to the event and the Artist space at the exhibit is a great way to support local Art. We hope to see you see. Our Artist Support Link: https://rawartists.com/DESIGNEDBYANNELLC One of the many favorite projects we have is designing our own urban container and landscape garden. Selecting the appropriate plants is key for weather hardiness and zoning for the plants to thrive. In the photos below, you can view plants that I have hand selected and planted such as Hosta, Boston ferns, boxwood evergreens, dusty millers, African marigolds, dwarf Alberta arborvitaes and a crimson queen Japanese maple. All of these plants have a special place in my heart. I also favor indoor plants like majesty palms and mass cane varieties. The citronella (mosquito plant) is a wonderful addition during the Summer months with lacy lemon scented leaves for inspiration. Many of these types of specie of plants enjoy shade and full sun for their health. I love flowers. However gardening was the furthest from my mind until a few years ago, when my son invited me to Lewis Ginter Botanical Garden for Mother's Day. Since that day of pop up inspiration, I've discovered another part of my flow and character tapped into. Gardens are not just for plants. You can include vegetables, fruits and herbs like basil, lemongrass and rosemary. All you need to start is one or two plants. Try doubling up with the same plants if they are perennials. As your plants continue to grow, you can always divide them for in ground use with your landscape before the first frost. Throw in some great garden furniture and relax. Be sure to bring tropical plants indoors for winterizing. Spring 2020 will be around before you know it! Liked this post? Please share it or send us your questions and comments on getting started with your very own home garden experience. Happy gardening! #DIY #Design #Meraki #UrbanGarden #Inspiration 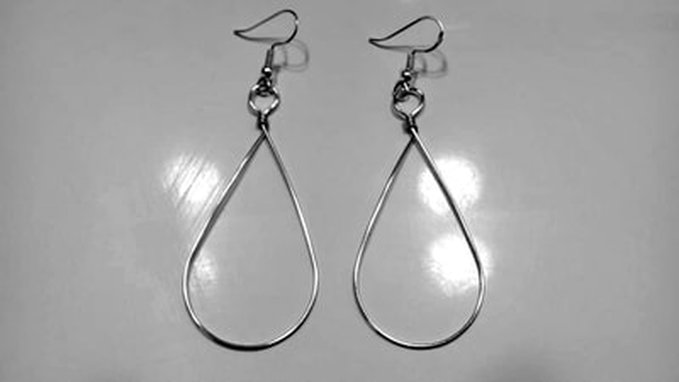 TO MAKE A WIRE-WRAPPED HOOP TOOLS YOU’LL NEED:
Begin by measuring your wire. This pair will be slightly larger than 6″ each. I’ve found that these are a great everyday size for lots of folks, but if you know that you like your pieces smaller, you could go for a 4.5″-5″ pair. Cut them both at the same time so you’re sure to have consistent sizing at the end. STEP 2: If you’ve used wire cutters, you’ll probably have crimped ends. These will end up being smack dab in the middle of the finished piece and, for the detail-oriented, can be quite an eyesore. You’re going this far, why not finish the ends? Just grab your file and flatten the ends. Then, when wire ends meet, you’ll have a nice clean connection. STEP 3: Likely, your wire will have been spooled when you purchased it and this is one of those rare moments when that actually works to your advantage. Note what direction the curve swoops and imagine that being the inner diameter of your hoop. Hold it in your hands so it swoops upward and to the right. Now, using your needle-nose pliers, make a small circle backwards so it ends perpendicular to your original curve. You’ll want this to be large enough for the other end of your wire to fit through but not too large that it’ll look sloppy when finished. STEP 4: Find the general center of your wire and line that up with the mandrel or round object you’ll be using. It doesn’t need to be perfectly center but it’ll help you in the long run if it’s closer than not. You’ll want to choose the depth of the curve you want at this point. If you form your hoop around the larger part of the mandrel, you’ll have a wider, more circular shape. Whereas, a smaller form will create an elongated teardrop shape. STEP 5: Put gentle pressure on both sides of the wire as you begin to shape it around your mandrel. Moderate is key here — if you push way too hard that can lead to some misshaping. Best not to have to fix silly problems in the long run. Go slow and you’ll make make fewer mistakes until you get the hang of it. STEP 6: As the two ends begin to meet one another, press a tiny bit harder on the end with no loop. Just enough so it will just barely fit into the hole on the other side. You want to make this fit as soon as you can so that you don’t get extra bending in your wire. STEP 7: Using your needle-nose pliers, form a small circle (as close to the same size as your original one), so the filed end meets the neck of the teardrop. STEP 8: Use your flat-nosed pliers to adjust any parts that may have gotten a little wonky. There you have it, you’re finished your first hoop! STEP 9: Repeat Steps 1-9, making sure that you use the same spot on your mandrel and pliers so you’ll have a matching pair. Attach ear wires and you’re all set. Happy Crafting! |

Author,Entrepreneur, Artisan 
Archives
January 2021
Categories |


 RSS Feed
