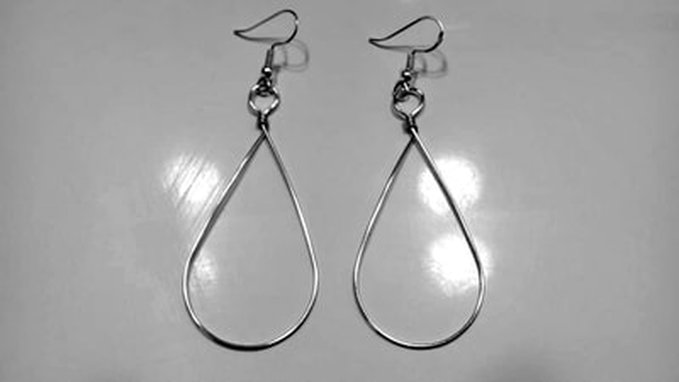
 TO MAKE A WIRE-WRAPPED HOOP TOOLS YOU’LL NEED:
Begin by measuring your wire. This pair will be slightly larger than 6″ each. I’ve found that these are a great everyday size for lots of folks, but if you know that you like your pieces smaller, you could go for a 4.5″-5″ pair. Cut them both at the same time so you’re sure to have consistent sizing at the end. STEP 2: If you’ve used wire cutters, you’ll probably have crimped ends. These will end up being smack dab in the middle of the finished piece and, for the detail-oriented, can be quite an eyesore. You’re going this far, why not finish the ends? Just grab your file and flatten the ends. Then, when wire ends meet, you’ll have a nice clean connection. STEP 3: Likely, your wire will have been spooled when you purchased it and this is one of those rare moments when that actually works to your advantage. Note what direction the curve swoops and imagine that being the inner diameter of your hoop. Hold it in your hands so it swoops upward and to the right. Now, using your needle-nose pliers, make a small circle backwards so it ends perpendicular to your original curve. You’ll want this to be large enough for the other end of your wire to fit through but not too large that it’ll look sloppy when finished. STEP 4: Find the general center of your wire and line that up with the mandrel or round object you’ll be using. It doesn’t need to be perfectly center but it’ll help you in the long run if it’s closer than not. You’ll want to choose the depth of the curve you want at this point. If you form your hoop around the larger part of the mandrel, you’ll have a wider, more circular shape. Whereas, a smaller form will create an elongated teardrop shape. STEP 5: Put gentle pressure on both sides of the wire as you begin to shape it around your mandrel. Moderate is key here — if you push way too hard that can lead to some misshaping. Best not to have to fix silly problems in the long run. Go slow and you’ll make make fewer mistakes until you get the hang of it. STEP 6: As the two ends begin to meet one another, press a tiny bit harder on the end with no loop. Just enough so it will just barely fit into the hole on the other side. You want to make this fit as soon as you can so that you don’t get extra bending in your wire. STEP 7: Using your needle-nose pliers, form a small circle (as close to the same size as your original one), so the filed end meets the neck of the teardrop. STEP 8: Use your flat-nosed pliers to adjust any parts that may have gotten a little wonky. There you have it, you’re finished your first hoop! STEP 9: Repeat Steps 1-9, making sure that you use the same spot on your mandrel and pliers so you’ll have a matching pair. Attach ear wires and you’re all set. Happy Crafting!
0 Comments
|

Author,Entrepreneur, Artisan 
Archives
January 2021
Categories |
 RSS Feed
